So you want to save some juice on your laptop... find out how!
1. Be sure to make the brightness of your computer to the lowest setting that is comfortable. To do this, look for a purple "fn" button on the keyboard(usually next to the left ctrl key, sometimes the key has blue lettering instead of purple). After you've found the "fn" button, quickly search for another key with a purple or blue sun with an up or down arrow(usually on the arrow keys or on one of the F1-F12 keys). Now while holding "fn" press the button with the purple/blue sun and a down arrow.
2. Turn off all background programs that are not needed because they take up processor space which will use more battery.
3.Check that bluetooth and/or wireless adapter is off (if it's built in).
4. Be sure to eject any discs out of your CD or DVD drive if you do not need them. The disc will still be spinning inside and consumes a ton of energy.
5. If you are running very low on power, or are watching a DVD, your laptop may have a way to turn off the LED lights (Power light, hard drive activity light, etc.). Check your owners manual to see how.
6. Unplug any USB devices you are not using (iPods, Flash Drives, External USB mice, etc.). Many of these devices draw power from your USB port, up to 500 mA (about a half an Amp) and 5 volts. It adds up quickly depending on how many you have plugged in.
7. When you are not going to use your laptop for a short time, put it into standby or sleep mode. This will only leave dire essential components in the computer running such as the memory. And allow you to resume working on your computer quickly.
8. When you are not going to be using your laptop for a even longer time, put it into hibernate mode. It will have the same effect as turning the computer off, but it will allow you to go back to working on your laptop just like in standby and uses little to no power from the battery.
Tuesday, July 15, 2008
> How to Break a BIOS Password?
For Desktop PC'S:
1. Power off the computer and make sure that it is unplugged.
2. Open up your computer case. You need physical access to the motherboard to complete this procedure.
3. Find a circular, (mostly) silver metallic object on the motherboard.
This is the CMOS battery.
4. CAREFULLY remove the CMOS battery and leave it out for about 120 seconds. This will flush the CMOS memory which stores the BIOS password and all other configuration. (See Warinings)
5. Set the battery back into place and power on the computer.
6. The computer should then warn you that the CMOS configuration could not be found. You can either reconfigure it yourself or restore defaults. Restoring the default configuration should be fine.
7. You will notice that the BIOS password has been cleared and you can boot without it. You may reset the BIOS password to something else by going into the BIOS configuration and setting a new User Password (The Supervisor Password controls access to the BIOS, NOT the computer!)
For Laptop:
1. Remember that laptops can be trickier, especially if it's a newer model. If it has a security chip on the motherboard forget about it. You either have to physically remove the chip or contact the mfg for the "master" password. If you can boot up off of a cd or floppy try any of these methods:
2. Create a Win98SE bootable media "or anything that lets you boot into MS-DOS" and boot off of it.
3. When the A:\> prompt appears type debug and press enter.
4. You will then only see a "-".
5. Type o 70 2E "include the spaces" and press Enter.
6. Type o 71 ff "include the spaces" and press Enter.
7. Type q and press Enter.
8. Here are a list of common mfg backdoor passwords:
AWARD BIOS :
AWARD SW, AWARD_SW, Award SW, AWARD PW, _award, awkward, J64, j256, j262, j332, j322, 01322222, 589589, 589721, 595595, 598598, HLT, SER, SKY_FOX, aLLy, aLLY, Condo, CONCAT, TTPTHA, aPAf, HLT, KDD, ZBAAACA, ZAAADA, ZJAAADC, djonet, %øåñòü ïpîáåëîâ%, %äåâÿòü ïpîáåëîâ%
AMI BIOS:
AMI, A.M.I., AMI SW, AMI_SW, BIOS, PASSWORD, HEWITT RAND, Oder
9. Other passwords you may try (for AMI/AWARD or other BIOSes) - LKWPETER, lkwpeter, BIOSTAR, biostar, BIOSSTAR, biosstar, ALFAROME, Syxz, Wodj
Tips:
1. Depending on the manufacturer of your motherboard, you may be able to use what it is called a "backdoor password" to bypass the password problem. Try looking at the external links for possible passwords.
2. Remember that passwords are Case Sensitive. The last two passwords in the AWARD BIOS list are in Russian.
3. Sometimes the bios reset jumper has a "handle" and is colored a bright color to make it easy to locate. Also, look in your case near the bottom. If it is a manufactured computer then it probably came with a little sticker with the jumpers and the location of the reset jumper.
Warnings:
1. In rare cases, the battery may be soldered into the motherboard and very difficult to remove. If this is true, you may need to find a jumper near the battery that achieves the same result. If you don't know which jumper it is, you CAN test them all. Unplug (really unplug, not just power off) the computer, and start a methodical change in all the jumpers positions, change one, count to ten, change it back, move on the next. After completing the lot of them (on older motherboards this could take a while) plug the PS back in, and boot up. You may risk damaging your computer with this procedure if you are not careful.
2. Some notebooks such as IBM's ThinkPad render useless when the BIOS password is being tried to reset.
3. Don't just start pulling jumpers on the motherboard. Make sure you know where it was and in what position in case anything goes wrong put it back.
4. If you turn your computer on and it makes strange noises / beeps, you should contact the vendor, manufacture, or a tech guy to fix it.
Saturday, July 12, 2008
> How to Find or Change My Computer's Administrator?
The computer administrator account has full access to a user’s computer. Leaving the system with the default administrator settings could be devastating if someone gained access to your computer. They could login and have complete control to delete any files and install any malicious programs they want. These steps will show you how to find and change your system's administrators.

1. Locate the My Computer icon on your desktop.
2. Right click the icon and then click on Manage on the menu that should appear next to the cursor. This will bring up the Computer Management window.
3. Locate the Local Users and Groups heading and click the plus symbol to the left of it.
2. Right click the icon and then click on Manage on the menu that should appear next to the cursor. This will bring up the Computer Management window.
3. Locate the Local Users and Groups heading and click the plus symbol to the left of it.
4. Click on Groups on the menu that opens. You will now see headings for Administrators, Guests, Power Users, etc.
5. Double click on Administrators. This brings up a list of all the administrators on your machine. If you have administrative access to this computer, you should be able to change the settings in this menu.
6. To add a new administrator, click the Add button. This will open a new window. Type in the name of the account you wish to add and click Check Names. The name should now be underlined. Click OK to close this window and save your settings.
7. To remove an administrator, highlight the account you wish to remove from the group and click the Remove button at the bottom of the window.
8. If you wish to retain your own administrative rights, make sure not to delete your account from this list.
9. If the settings for your account haven't been changed, there is no need to reboot. Otherwise, logout and login again so that the settings will change.
> How to Delete Adware Threats That Norton Antivirus Can't Delete?
Every week Norton Anti-virus runs and tells it has located two adware threats: bridge.inf and HDPlugin1019.dll (yours may vary). When people go to find the files in the specified folder, they are not there.
1. Ensure you have the latest definition updates for NAV and run it as usual.
2. Record names. If it lists the adware threats in the summary, record the name of the threats (eg. bridge.inf, HDPlugin1019.dll).
3. Click the name of each threat to open a small box that contains the full path to each offending file (eg.The file C:\WINDOWS\Downloaded Program Files\bridge.inf is a Adware threat.). Record the path carefully. That is all you need from NAV - you can now close it.
4. Click your start button on your Windows taskbar to bring up your main menu.
5. Find and click 'Run...' on your menu.
6. Type 'cmd' in the text field and click OK. This will open a DOS window (a small window with white on black text). The text will say Microsoft Windows blah blah blah, then C:\Documents and Settings\\
7. Type 'cd\' and hit return/enter . This will 'change directory' to the root of your C: drive: C:>
8. Type 'cd ' followed by the path to the first of the offending files (eg. 'cd WINDOWS\Downloaded Program Files' - note the space after 'cd') and hit return/enter.
9. Type 'dir' once you get to the directory. You will see a 'directory' of all files in the folder. Ensure the offending file is listed there.
10. Type 'del ' followed by the name of the offending file (eg. 'del bridge.inf') to 'delete' the file.
11. Type 'dir' again to list the directory, then assure yourself that the offending file is gone.
12. Repeat from step 11 until all are gone if you have more than one file and the remainder are in the same directory.
13. Repeat from step 8 if you have more than one file and the remainder are NOT in the same directory.
14. Type EXIT and hit return/enter to close the DOS window when all your files are gone.
1. Ensure you have the latest definition updates for NAV and run it as usual.
2. Record names. If it lists the adware threats in the summary, record the name of the threats (eg. bridge.inf, HDPlugin1019.dll).
3. Click the name of each threat to open a small box that contains the full path to each offending file (eg.The file C:\WINDOWS\Downloaded Program Files\bridge.inf is a Adware threat.). Record the path carefully. That is all you need from NAV - you can now close it.
4. Click your start button on your Windows taskbar to bring up your main menu.
5. Find and click 'Run...' on your menu.
6. Type 'cmd' in the text field and click OK. This will open a DOS window (a small window with white on black text). The text will say Microsoft Windows blah blah blah, then C:\Documents and Settings\
7. Type 'cd\' and hit return/enter . This will 'change directory' to the root of your C: drive: C:>
8. Type 'cd ' followed by the path to the first of the offending files (eg. 'cd WINDOWS\Downloaded Program Files' - note the space after 'cd') and hit return/enter.
9. Type 'dir' once you get to the directory. You will see a 'directory' of all files in the folder. Ensure the offending file is listed there.
10. Type 'del ' followed by the name of the offending file (eg. 'del bridge.inf') to 'delete' the file.
11. Type 'dir' again to list the directory, then assure yourself that the offending file is gone.
12. Repeat from step 11 until all are gone if you have more than one file and the remainder are in the same directory.
13. Repeat from step 8 if you have more than one file and the remainder are NOT in the same directory.
14. Type EXIT and hit return/enter to close the DOS window when all your files are gone.
>How to Block and Accept Cookies in Internet Explorer?
1. In Internet Explorer, on the Tools menu, click Internet Options.
2. Click the Privacy tab, and then click Advanced.
3. Click Override automatic cookie handling, and then specify how you want Internet Explorer to handle cookies from first-party Web sites and third-party Web sites (a Web site other than the one you are currently viewing).
4. To specify that you want Internet Explorer to always allow cookies to be saved on your computer, click Accept.
5. To specify that you want Internet Explorer to never allow cookies to be saved on your computer, click Block.
6. To specify that you want Internet Explorer to ask whether or not you want to allow a cookie to be saved on your computer, click Prompt.
7. If you want Internet Explorer to always allow session cookies (cookies that will be deleted from your computer when you close Internet Explorer) to be saved on your computer, click Always allow session cookies.
Tips:
1. You can delete all cookies in the temporary internet files folder by selecting "Tools" then clicking on "Internet Options..." at the bottom of the menu. Then just click the "Delete Cookies" button and then subsequently, the "OK" option.
2.Cookies are a widespread privacy concern, and in most circumstances can be BLOCKED. Simply "allow" cookies from the sites that request them (bank sites, forums, and other "log in" type sites usually require cookies to save your username and password)
Sunday, June 1, 2008
> How to Install Windows XP SP2?
Microsoft Windows is a user-friendly, GUI (Graphical User Interface) operating system (OS), used by around 90% of the PCs in the world. Nowadays, many applications in the market tend to support Windows. Follow the steps below, and install this operating system by yourself, without calling a highly-paid computer technician at your home.
Booting Form CD:

4.Follow the Instructions as seen.


5.Enter the partition Space which do you want?

 6.If you are formatting PC for the First time then better don't use "Quick Format".


7. After loading system files PC will Restart automatically.
8.Now the format may complete approximately in 20 Min depending on your PC speed.


9.Now press Next...

10.Enter your name which do you want to display in start menu.

11.Enter 25 digit key provided with your XP CD carefully.

12.If you enter password here then it will ask's to enter password at every start up, it's not mandatory.

13.Set Date & Time accordimg to your Location.


14.Depemding on how many do you enter that many Users will appear in Start up.


Enjoy Microsoft Windows XP(Experience)...
Booting Form CD:
1. Soon after restarting your computer, if your computer won't boot from CD, then reboot and hold on F2 to start BIOS(Basic Input/Output System) settings. If nothing happens try restarting your computer again and press DEL key this time.
2. After BIOS loads completely (usually a blue screen). Go to 'Boot', by pressing the arrow keys.
3. After the [Boot] settings appear, seek an item named [Boot Priority]/[Boot Order] (or similar) etc., and press enter.
4. Then see if your CD-ROM is set as 'First boot device', it would have been named as [ATAPI CD-ROM], by its manufacturer's name, or simply [CD-ROM]. If it is not first boot device, then set it using the keys usually Page Up and Page Down. If not, then take help from the Legend which appears at the right portion of the screen.
5. After setting CD-ROM as the 'First Boot Device', press F10, the BIOS will ask you whether to 'Save Changes and Exit', select 'Yes'. The BIOS will automatically restart your Computer.
Installing Windows
1. Now after your computer reboots, A Black screen may appear showing the message 'Press any key to Boot from CD...', press any key.
2. Wait for 2-10 Seconds (depending on your System Speed), a Blue Screen will appear with a Title Windows Setup.
3. Follow the instructions on the screen to install Windows.
4. Format the drive and choose NTFS (rather than FAT32) if prompted.
5. Your computer will probably be restarted many times by the Windows Setup during the installation.
6.After the Windows is installed successfully, you are greeted with Welcome.
7. Install basic security software such as a firewall, antivirus program, and an anti-spyware program; the built-in Windows Firewall.
8. Update Windows and the security software. This should help protect against some viruses and improve stability.
9. Make sure that all your hardware is working. Unlike OEM installs, there can be some issues here. You might want to go to the hardware manufacturers' websites for the latest drivers.
10. You are done with installing Windows, now take a Quick Tour, as Windows will pop-up a message for it.
Step By Step Screen Shots:
1.Keep the Bootable XP CD in CD drive and Restart PC.
2.Then it will ask "Press Any Key To Boot From CD..." then press any key.
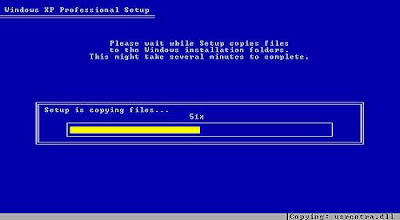
3.Then Screen appears like this

4.Follow the Instructions as seen.


5.Enter the partition Space which do you want?

 6.If you are formatting PC for the First time then better don't use "Quick Format".


7. After loading system files PC will Restart automatically.

8.Now the format may complete approximately in 20 Min depending on your PC speed.


9.Now press Next...

10.Enter your name which do you want to display in start menu.

11.Enter 25 digit key provided with your XP CD carefully.

12.If you enter password here then it will ask's to enter password at every start up, it's not mandatory.

13.Set Date & Time accordimg to your Location.


14.Depemding on how many do you enter that many Users will appear in Start up.


Enjoy Microsoft Windows XP(Experience)...
> Long delay before files appear in My Computer in Windows XP?
SYMPTOMS
When you click Start and then click My Computer, or when you double-click My Computer on your Windows desktop, Windows may search (a flashlight may appear) for a long time (for example, 5 minutes) before files appear.
CAUSE
This problem may occur if you install or use any of the following:
| • | Windows Image Acquisition (WIA) |
| • | HP ScanJet 4400C/4470C |
| • | HP ScanJet 5400/5470C |
| • | RCA DCM 215 DSL Modem |
| • | Cable Modem (model unknown) |
RESOLUTION
To resolve this problem, use one or more of the following procedures, appropriate to the software or hardware that you have that are listed in the "Symptoms" section of this article.
The third-party products that this article discusses are manufactured by companies that are independent of Microsoft. Microsoft makes no warranty, implied or otherwise, regarding the performance or reliability of these products.
Windows Image Acquisition
Stop the WIA service. To do so, follow these steps:| 1. | Click Start, and then click Control Panel. |
| 2. | Double-click Administrative Tools. |
| 3. | Double-click Component Services. |
| 4. | Click Services. |
| 5. | In the Services (Local) list, right-click Windows Image Acquisition (WIA), and then click Stop. |
HP ScanJet 3400C
Unplug the HP ScanJet 3400C from the Universal Serial Bus (USB) port, and then restart Microsoft Windows XP.HP ScanJet 5400/5470C
Unplug the HP ScanJet from the USB port, and then restart Microsoft Windows XP.RCA DCM 215 DSL Modem
Unplug all other USB devices when you use this modem.Cable modem (model unknown)
Unplug all other USB devices when you use your USB cable modem.The third-party products that this article discusses are manufactured by companies that are independent of Microsoft. Microsoft makes no warranty, implied or otherwise, regarding the performance or reliability of these products.
To accomplish this via command-line:
Click Start, Run and type CMD and press Enter
Run these commands one by one and press Enter:
NET STOP STISVC (This stops the service)
SC CONFIG STISVC START= DISABLED (This sets the Service startup type to disabled)
APPLIES TO
| • | Microsoft Windows XP Professional Edition |
| • | Microsoft Windows XP Home Edition |
Thursday, May 29, 2008
> How to Record sound or song with out Microphone?
Hi, If you want to record a sound that is inside a computer(Like you are playing a movie/song and You want to record some sound from that video/song) than it is right palace, You don't even need a Microphone instead Recording by Microphone from Speaker is a bad way of copying sound a lot of unpleasant noise is added. So this step by step guide will tell you how to... record sound with out Microphone
Things You’ll Need:
Jet audio(available for free)
Sound card installed in Computer(We will talk about it)
Step1:
This is First Step , You are going to check that whether sound card is installed in your computer or not ,to record a sound with out microphone still need sound card because in other case computer will not be able to understand and do something with sound instead computer can make beebs without a card...To check Go to Start Menu>setting>Control Panel>Sounds and Audio Devices then Options like Advance and Mute look enabled and you can change them Its mean you have your Sound Card Installed otherwise first install sound card ,If you have then you can move ahead.
Step2:
Now About Jet Audio this is the programme we are going to use for recording because of its wonderful features ,To install Go to Download.com and search for jet audio and download it. If you don't find then copy paste this url into address bar above from here : http://dw.com.com/redir?edId=3&siteId=4&oId=3120-20_4-0&ontId=20_4&lop=link&tag=tdw_dltext<ype=dl_dlnow&pid=10783427&mfgId=56361&merId=56361&destUrl=http%3A%2F%2Fwww.download.com%2F3001-2167_4-10783427.html ..............This Programme is going to help in recording.
Step3:
Now Run Jet Audio then hit the button Record and then from source list choose Mono Mix/Stereo Mix then start the song you want to record then click on the start button recording window and click stop button when you wish to stop the sound ,Sound will be saved in My Documents or the folder you assigned in target section.
Step4:
Jet audio is also useful for other stuff but for recording a sound without Microphone is best ,Make sure you hear your sound once to make sure it is recorded as you wanted and Now In Final Rate It I will be glad to help you by answering your comments
Note:
Jet Audio Produce Wav File like sound.wav i recommend to convert this into Mp3 File like sound.mp3 ,To convert visit download.com and search for wav to mp3 converter and here you go.It will help to minimize the size of File about 90%.
> How to make Windows genuine using Notepad?
Most of the time the Windows version we use are fake. When we try downloading updates or components from microsoft.com, a windows genuine advantage wall(WGA) checks if the windows version we are using is genuine. If it's not genuine we can't proceed for the download. However, the WGA wall can be bypassed.I tell you step-by-step method to do this. You just need to open a Notepad and do exactly what I mention.
Step1:
Copy and Paste the following code in the Notepad.
Step2:
Windows Registry Editor Version 5.00[HKEY_LOCAL_MACHINE\SOFTWARE\Microsoft\Windows NT\CurrentVersion\WPAEvents]"OOBETimer"=hex:ff,d5,71,d6,8b,6a,8d,6f,d5,33,93,fd"
LastWPAEventLogged"=hex:d5,07,05,00,06,00,07,00,0f,00,38,00,24,00,fd,02[HKEY_LOCAL_MACHINE\SOFTWARE\Microsoft\Windows NT\CurrentVersion]"CurrentBuild"="1.511.1 () (Obsolete data - do not use)""InstallDate"=dword:427cdd95"ProductId"="69831-640-1780577-45389""DigitalProductId"=hex:a4,00,00,00,03,00,00,00,36,39,38,33,31,2d,36,34,30,
2d,\31,37,38,30,35,37,37,2d,34,35,33,38,39,00,5a,00,00,00,41,32,32,2d,30,30,30,\30,
31,00,00,00,00,00,00,00,00,0d,04,89,b2,15,1b,c4,ee,62,4f,e6,64,6f,01,00,\00,00,00,00,
27,ed,85,43,a2,20,01,00,00,00,00,00,00,00,00,00,00,00,00,00,00,\00,00,00,00,00,00,
00,00,00,00,00,31,34,35,30,34,00,00,00,00,00,00,00,ce,0e,\00,00,12,42,15,a0,00,08,
00,00,87,01,00,00,00,00,00,00,00,00,00,00,00,00,00,\00,00,00,00,00,00,00,00,00,
00,00,00,00,00,00,00,00,94,a2,b3,ac"LicenseInfo"=hex:9e,bf,09,d0,3a,76,a5,27,bb,f2,
da,88,58,ce,58,e9,05,6b,0b,82,\c3,74,ab,42,0d,fb,ee,c3,ea,57,d0,9d,67,a5,3d,6e,42,0d,60,
c0,1a,70,24,46,16,\0a,0a,ce,0d,b8,27,4a,46,53,f3,17
Step3
Save the file with the .reg extension.
Step4:
If you run the file means it will ask you the confirmation to add the value to your Registry.
Step5:
Press Yes. Reboot your System.
Step6:
Start Downloading from Microsoft Site totally circumventing the WGA check.
> How to Add a Destination to the "Send To" Menu?
You are probably aware that when you right click many items on your computer, you will see a “Send To” option which allows you to send the item to a few different places. What you might not know is that you can add more destinations to this menu. The following steps will show you how.
Step1:
Click “Start” and then click “My Computer.”
Step2:
Double click “Local Disk (C:)” and then double click “Documents and Settings.”
Step3:
Double click the folder with your computer logon name.
Step4:
Double click the “Send To” folder.
Step5:
Click “File” from the toolbar. Point to “New” and then click “Shortcut.” Use the “Shortcut Wizard” to create a shortcut to the destination you wish to add to the “Send To” menu.
Step6:
By default, the "Send To" folder is hidden. If you don't see it try this:* Click "Tools" in the toolbar.* Click "Folder Options."* On the "View" tab, click "Show Hidden Files and Folders" and then "Apply and "OK."
> How to Copy Files From Windows 98 to Windows XP?
Upgrading your operating system from Windows 98 to Windows XP should be a relatively simple process. However, there are steps to take if you don't want to lose data from your hard drive. You can either create copies of your files on disc, or you can choose to use a Windows XP Upgrade version instead of a full version. Either way, it is possible to copy files from Windows 98 to Windows XP.
Copy Files From Windows 98 to Windows XP
Step1
Select all of the files you want to copy and place them in a separate folder. This will make it easier to find the files when you are ready to copy them.
Step2
Transfer that folder to a zip disc or queue it to be written to a CD. Make sure that the folder contains less than 700 megabytes of information or it will not fit on one disc. If you have more, use additional disc/folder combinations to get everything.
Step3
Paste your files into Windows XP once they've transferred to disc. This is, by far, the easiest method you can use to copy files to Windows XP.
Copy Files Using the File Settings and Transfer Wizard
Step1
Start the File Settings and Transfer Wizard within Windows 98 or from the Windows XP installation disc.
Step2
Choose the transfer method you wish to use. You may use a direct cable if you're loading windows XP on another computer. You can also choose to transfer files over a home or office network. You may choose "Other" to use a zip-disc method.
Step3
Choose specific items to transfer from your hard drive. A menu will appear that will permit you to browse the files on your system and choose the ones you want to copy.
Step4
Click "Next" when prompted to do so. You will be lead to either identify programs that Windows XP is already familiar with or you will simply begin the copy procedure.
Step5
Exit the Wizard once you've finished copying your files. You may then continue to install Windows XP.
> How to Install DHCP Server in Windows?
A DHCP or Dynamic Host Configuration Protocol is a set of guidelines used by networked devices to communicate to get necessary parameters in order for them to operate in an Internet Network. This is used to minimize the need to ask necessary questions or having to do things manually. A DCHP is required when you need to obtain an IP address to use on a website.
Step2
First go to Start, and click on Settings, and then click Control Panel.
Step3
On the Add/Remove Programs menue click on Add/Remove Windows Components.
Step4
Once in the Windows Component Wizard Screen, click on Networking Services in the Components box, and then click on Details.
Step5
Select the Dynamic Host Configuration Protocol (DHCP) check box and click ok.
Step6
In the Windows Components Wizard Screen, click Next to start Windows 2000 Setup.
Step7
Insert the Windows 2000 Advanced Server CD-ROM into the CD-ROM drive if told to do so. The setup will make copies of the DHCP server and tool files to your computer.
Step8
Once the setup has completed click finish.
Things You’ll Need:
- DNS server
- Computer
Step1
Depending on the version of Windows that you, have these steps will be slightly different. This demonstration is for Windows 2000. Step2
Step3
Step4
Step5
Step6
Step7
Step8
> How to Check Your Anti-Virus Software Working Properly Or Not.?
This article is best in checking out whether your antivirus software is running at its best or not. It was not known to many that how to check the antivirus software they are using is working properly or not. Please read the article for the details.
X5O!P%@AP[4\PZX54(P^)7CC)7}$EICAR-STANDARD-ANTIVIRUS-TEST-FILE!$H+H*
Step3
Now Save it with the name fakevirus.exe in any of your folder/drives.
Step4
If this file got deleted immediately...then it means that your antivirus is working properly and updated !!
Step5
If this doesnt happens and you see the saved file in that folder do right click the file and select scan with your installed antivirus and if the scan shows the file then it means your antivirus is working properly but not updated with a new version, as best antivirus softwares detect any virus (at the same second when you save the same in your system)without your effort of going to specified folder and scanning the folder.
Step6
If it doesnt shows any kind of threats then you need to change your antivirus software immediately with some good one with the new version.
Things You’ll Need:
- Anti Virus software installed in your PC.
- Notepad.
- Courage to create a virus and save it to your own system. (Dnt worry)
Step1
Click Start --> Open Notepad -->Step2
Copy the code exactly in the notepad :X5O!P%@AP[4\PZX54(P^)7CC)7}$EICAR-STANDARD-ANTIVIRUS-TEST-FILE!$H+H*
Step3
Step4
Step5
Step6
> How to Clear IE7 Browsing History From the Command Line?
If you like to build batch files to automate cleanup on your computer, you'll probably want to include at least one of these commands in your batch script. You can automate any one of the functions on the Internet Explorer 7 Delete Browsing History dialog.Here's the dialog that you are probably used to seeing:

And here's the commands that correspond to the different buttons. The most important one from a cleanup perspective is the first, which will delete just the temporary internet files that are cluttering up your computer.
To use these commands, just run them from the command line, the start menu search box in vista, or a batch file.
Temporary Internet Files:
RunDll32.exe InetCpl.cpl,ClearMyTracksByProcess 8
Cookies
RunDll32.exe InetCpl.cpl,ClearMyTracksByProcess 2
History
RunDll32.exe InetCpl.cpl,ClearMyTracksByProcess 1
Form Data
RunDll32.exe InetCpl.cpl,ClearMyTracksByProcess 16
Passwords
RunDll32.exe InetCpl.cpl,ClearMyTracksByProcess 32
Delete All
RunDll32.exe InetCpl.cpl,ClearMyTracksByProcess 255
Delete All - "Also delete files and settings stored by add-ons"
RunDll32.exe InetCpl.cpl,ClearMyTracksByProcess 4351
These commands should work in Internet Explorer 7 on XP or on Windows Vista.
Saturday, May 24, 2008
> How To Remove Yahoo Messenger Virus?
It is one of the most powerful Trojan /virus I have ever seen.. If your computer is infected with this virus " It will sends the nsl-school.org url to all of your friend list in yahoo messenger using your ID . So with in few hours many of your friends will get infected with it.
I don't know the actual target of the idiot who created it. May be to advertise his site or to steal very imp data from your computer. I resolved the problem manually from 2 infected PC's. Just go through the below steps carefully.
What are those links ?:
www.Nsl-school.org
or other (Do not open this url in your browser).
If you are infected with it what is going to happen ?
1: It sets your default IE page to www.nsl-school.org , you can’t even change it back to other page. If you open IE from your comp some malicious code will automatically executed into your computer.
2: It will disables the Task manager / reg edit. So you can’t kill the Trojan process anymore.
3: Files that are gonaa installed by this virus are svhost.exe , svhost32.exe , internat.exe.
you can find these files in windows/ & temp/ directories.
4: It will sends the secured & protected information to attacker
How to remove this manually from your computer ?
1: Close the IE browser. Log out messenger / Remove Internet Cable.
2: To enable Regedit
Click Start, Run and type this command exactly as given below: (better - Copy and paste)
REG add HKCU\Software\Microsoft\Windows\CurrentVersion\Policies\System /v DisableRegistryTools /t REG_DWORD /d 0 /f
3: To enable task manager : (To kill the process we need to enable task manager)
Click Start, Run and type this command exactly as given below: (better - Copy and paste)
REG add HKCU\Software\Microsoft\Windows\CurrentVersion\Policies\System /v DisableTaskMgr /t REG_DWORD /d 0 /f
4: Now we need to change the default page of IE though regedit.
Start>Run>Regedit
From the below locations in Regedit chage your default home page to google.com or other.
HKEY_CURRENT_USER\SOFTWARE\Microsoft\Internet Explorer\Main
HKEY_ LOCAL_MACHINE\SOFTWARE\Microsoft\Internet Explorer\Main
HKEY_USERS\Default\Software\Microsoft\Internet Explorer\Main
Just replace the attacker site with google.com or set it to blank page.
5: Now we need to kill the process from back end. Press Ctrl + Alt + Del
Kill the process svhost32.exe . ( may be more than one process is running.. check properly)
6: Delete svhost32.exe , svhost.exe files from Windows/ & temp/ directories. Or just search for svhost in your comp.. delete those files.
7: Go to regedit search for svhost and delete all the results you get.
Start menu > Run > Regedit >
8: Restart the computer. That’s it now you are virus free.
I don’t know whether any removal patch that works for this Trojan/virus. But we can easily delete it manually.
Conclution : Better not to open any unknown url from your Computer.. There are lot of black hat hackers who are waiting to steal your credit card numbers, passwords or what not.... Use a better firewall & updated anti virus. However an Antivirus can do nothing if the virus is very latest...
> How to Open Multiple Google Talk Accounts Simultaneously?
"c:\program files\google\google talk\googletalk.exe" /nomutex

Wednesday, May 21, 2008
> How to Remove Orkut & youtube Virus?
The solution to th virus “How to remove the Virus
The same solution can also be used for " How to remove the
This virus even infects XP with SP2 and most of the
antivirus solutions leave this undetected .
- Open you task manager by pressing ctrl+Alt+
- Now go to processes tab and click users so as to arrange the processes according to the
- Now look for svchost.exe run by User name “user” or “admin” or “your computer name”.
- Right click and end the svchost.exe processes where the User Name is not “SYSTEM” or
- In the dialogue window, type “ cd \ ” and press Enter
- It will change to C:\>
- Next, type " attrib -s -r -h heap41a /s /d "[without quotes ] and press Enter
- Then Open C: on My computer and delete the folder heap41a i.e. C:\heap41a
- Now remove C:\heap41a\svchost.exe shortcut from
By doing this you deleted the virus. This virus mainly spreads through pen drives. Whenever
you insert a pen drive , try to delete the autorun.inf file in it and other hidden .exe files inside
it which are shown with folder icon.
Tuesday, May 20, 2008
> How to Schedule a restart operation with Windows XP's Shutdown utility ?
Note: This tip applies to both Windows XP Home and Professional editions.
Wouldn't it be nice if each morning your Windows XP machine restarted before you got to work so you had a fresh system to work on each day?
To help you automate this type of operation, Windows XP comes with a command-line utility called Shutdown.exe, which can restart your system. To make this happen automatically, you can configure it to run at a specified time with the Scheduled Tasks tool. Here's how:
1. Go to Control Panel | Scheduled Tasks.
2. Double-click Add Scheduled Task to launch the Scheduled Task Wizard.
3. Click Next and then click the Browse button.
4. Access the Windows\System32 folder, select Shutdown.exe, and click Open.
5. Follow the wizard through the next two screens to give the task a name and choose a schedule.
6. Enter your user account name and password and click Next.
7. Select the Open Advanced Properties check box and click Finish.
8. In the task's Properties dialog box, add the /r parameter to the end of the command line in the Run text box and click OK. (Be sure to include a space between the last character in the command name and the first character in the parameter list.)
9. Enter your user account name and password and click OK.
Sunday, May 18, 2008
> Integrate / slipstream Windows XP SP3 in Windows setup or installation CD / Media
As we all know Microsoft has released the final service pack of Windows XP x86 to the public. The Windows XP Service Pack 3 (SP3) is now available under Windows update.

One may obtain the service pack via Windows Update or by downloading the stand alone installation EXE via Microsoft web sites also. It is recommended that if you have a single or few PCs, then please use the Windows update as in that case for an up-to-date Windows XP SP2 system the download size would be around 70 MB.
Where as if you have many PCs under your network or administration, then please obtain the network installation or stand alone version to install off-line !!
Windows XP Service Pack 3 Network Installation Package
When many users have bought Windows XP, they have found that Windows XP comes with SP2 pre-integrated under the installation media, so when you install Windows XP from such installation media, you find that you installation already have SP2 under it.
Many users are now searching for answer as how do you integrate the SP3 under this present installation media, here is a guide which may help you to integrate the SP3 under Windows XP installation media.
How do you slipstream / integrate Windows XP SP3 into you Windows installation media ?
The process is pretty simple, may take just 30 mins to complete !! One may just follow these basic steps to complete the action.
What do you need to begin the process (prerequisites) ?
Hardware prerequisites
- Internet connection to obtain the SP3 network installation or standalone version
- A PC
- 4 GB of Free HDD Space
- CD Writer
- Blank CD-R
Software prerequisites
- Windows OS (Win 2000, XP, Vista / Server 2000, 2003, 2008)
- Nero / Ashampoo / Any burner to burn bootable CD
Obtain the Service pack and installation Media
Please download the RTM version of Windows XP SP3 from given link of top of this post.
Copy all data at your HDD
In my case I am copying all my data to HDD drive F in which I have more than 4 GB of free space, which is needed to complete the operation.
Copy all data of Windows installation CD (Windows XP / Windows XP SP1 / Windows XP SP2) to F:\CD folder.

Place the Windows XP SP3 at F:\SP3 folder and rename the default “WINDOWSXP-KB936929-SP3-X86-ENU.exe” to SP3.exe
Extract the SP3
Now please start command promt from Start > Accessories > Command and navigate to F:\SP3, via command, F: and cd sp3. This should land you at the F:\SP3 directory containing the SP3 network installation file. Therefore please run command, sp3.exe -x:f:\sp3\

Now you may see there is a folder named i386 containing many files and folder in side the SP3 directory which you have under your F:\ drive.
Start the integration / slipstream process
The update file is located at f:\sp3\i386\update folder, therefore at that command promt window please run these following sets of commands. To navigate to the update folder (f:\sp3\i386\update), please type command, cd i386 & press enter, and next type cd update & press enter (assuming you are already at F:\SP3 location).
Now please run the command to start the update, update -s:F:\CD
 This would start the update process to slipstream of integrate the Windows XP SP3 under your windows installation source !!
Subscribe to:
Comments (Atom)